Install Python setup
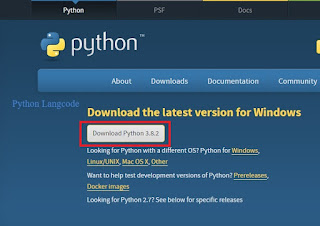
Step:- 1 Download and install Python on the official website of Python
https://www.python.org/downloads/
and choose the Latest Python version 3.8.2.
 |
| Python |
Step:-2 When the download is complete then run the exe (Executable file) file to install Python. Now click on "Install Now"
 |
| Install Python 3.8.2 |
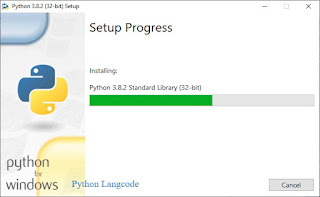
Step:- 3 You will see the process of installing python has started.
 |
| Setup Process |
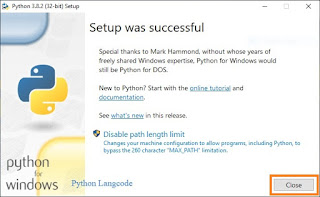
Step:- 4 When this process ends, you will see that on your screen you will be told that setup is installed successfully. Now you click on "Close"
 |
| Setup Successful |
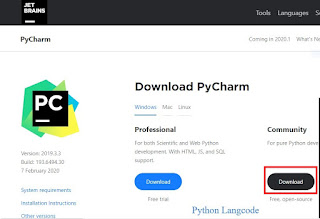
Install Pycharm
and click on the "Download" link under the community section.
 |
| Download Pycharm |
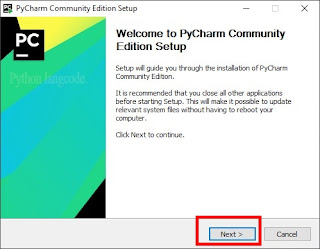
Step:- 2 When the download is complete then run exe (Executable File) to install PyCharm and click "Next" to start the setup.
 |
| Edition Setup |
Step:- 3 At the top of the second screen you can change the path if necessary and click "Next".
 |
| Install Location |
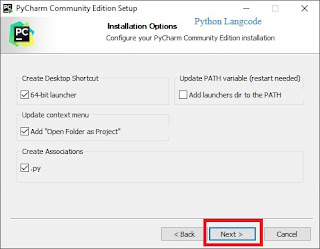
Step:- 4 On the next screen you can create a shortcut if you want to select 32 bits and 64 bits according to your computer and click on "Next".
 |
| Create shortcut |
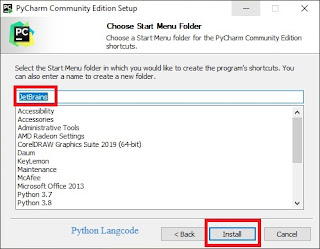
Step:- 5 Select the start menu folder and select JetBrain from it, then click on install.
 |
| Select Jetbrain |
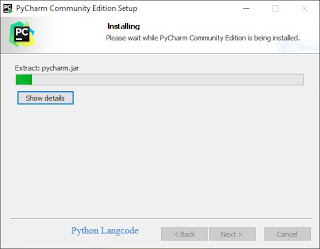
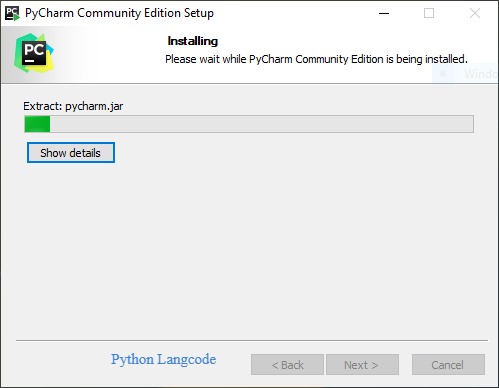
Step:- 6 Wait for the installation to finish.
 |
| Installing |
Step:-7 When the installation is finished you will see a message on your screen. If you want to run Pycharm, then click on the box "Run PyCharm Community Edition" then "finish".
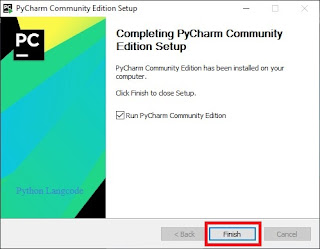 |
| Run and finish |
 |
| Process end and start |
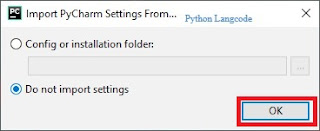
Step:- 8 After clicking on "finish", the screen below will be ready.
Create the Print Program in Python click here
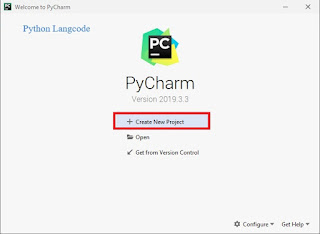 |
| create new page |


6 Comments
Good
ReplyDeleteThanku
ReplyDeleteVery good
ReplyDeleteThanku jii
ReplyDeletenice
ReplyDeletethanku
ReplyDelete